I’ve recorded a tutorial how to assemble Kayra’s left leg from the printed parts, four servos, two bearings and a couple of screws.
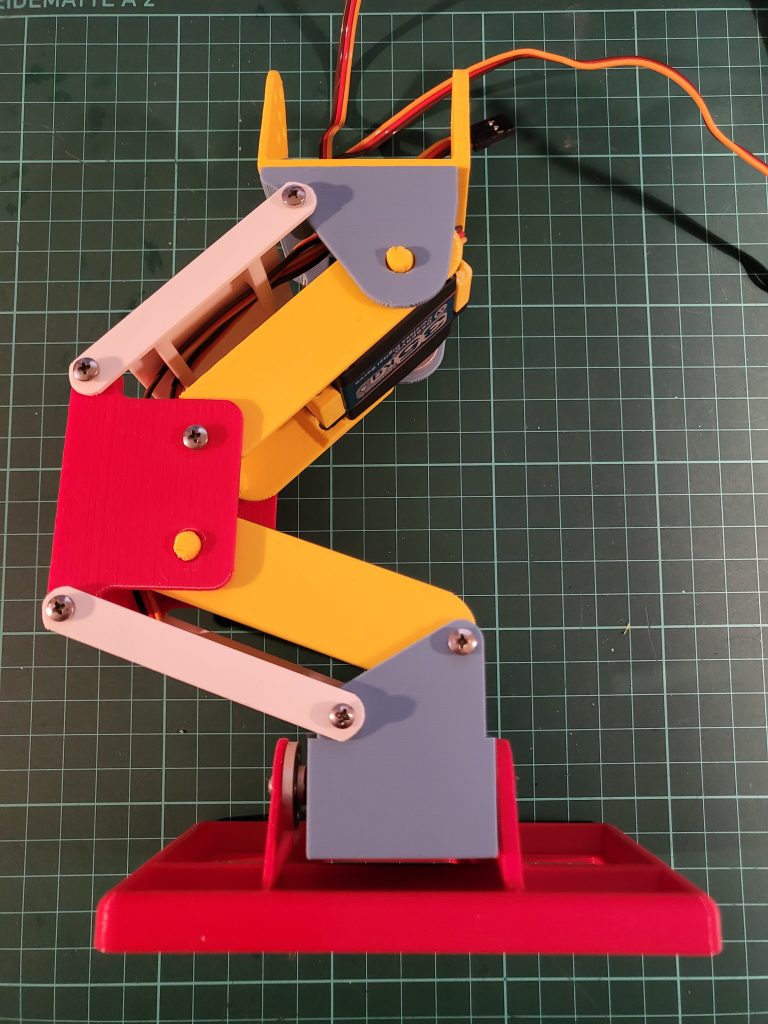
Here’s the instructions / timings from the YouTube video, you see that we can assemble a leg within 20min!
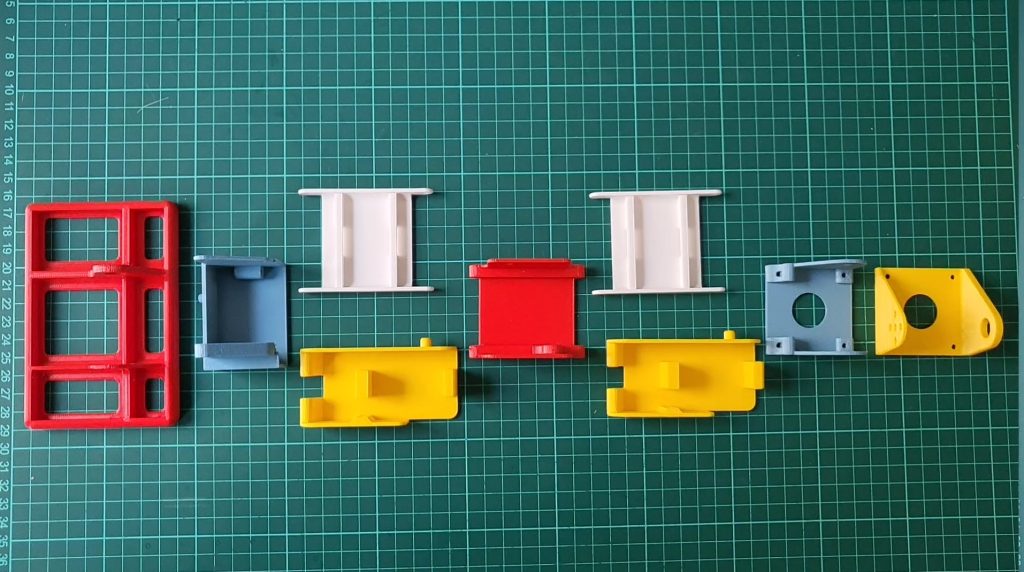
Note that the printed parts STLs are named bottom up (from foot to hip) and L is added where the part is different for the left leg compared to the right.
- 00:00 – introduction
- 00:43 – parts overview (plus servo horn orientations)
- 01:22 – screw & bearing explanation
- 01:49 – preparation: reference to rubber sole tutorial for the feet
- 02:06 – preparation: reference to servo centering tutorial
- 02:50 – screwing servo into the ankle / foot joint (STL named 2L)
- 04:05 – add the bearing to the ankle (you can do this faster than me)
- 05:10 – screwing the ankle to the foot (STL named 1L)
- 06:23 – add the shin to the ankle (STL named 3F F for “front”)
- 07:29 – screw the second servo into the calf (STL named 3BL, BL for back left)
- 08:40 – screw the calf to the ankle
- 10:10 – attach the knee to the calf (STL 4L)
- 10:50 – screw the lower calf’s servo to the knee
- 11:46 – screw the lower shin to the knee 12:40 – lower part of the leg DONE!
- 12:54 – both servo cables through the upper shin (identical STL named 3F)
- 13:32 – screw third servo to upper calf (identical STL named 2L)
- 14:45 – screw upper calf to knee
- 15:58 – geometry check: both calfs aligned?
- 16:14 – screw upper shin to knee
- 17:23 – explanation of the lower and upper hip parts (STL 5L_hipjoint_lower and 5L_hipjoint_upper)
- 18:33 – mounting the lower to the upper hip part
- 20:14 – servo cables through the hip holes
- 20:55 – mount & screw the upper calf to the lower hip
- 22:42 – screw the upper shin to the hip
- 23:18 – full leg assembled!!!
- 23: 34 – outlook: attaching legs to Kayra’s torso
Leave a Reply